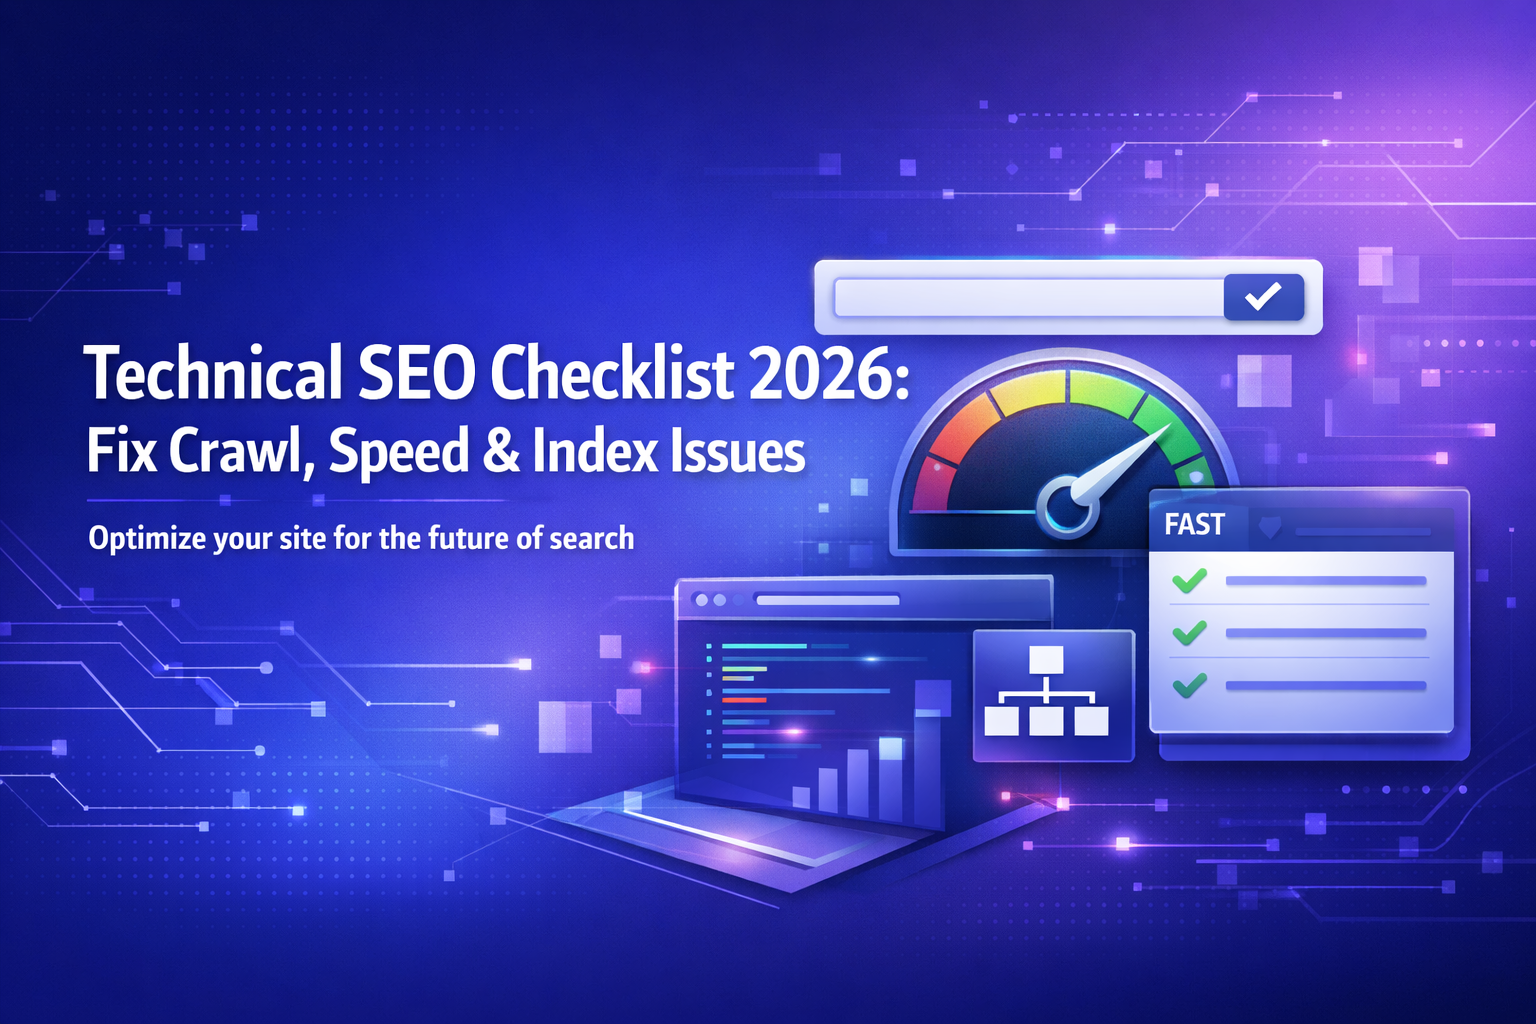
What Is Technical SEO (And Why It Matters More in 2026)
Technical SEO is the practice of optimizing your website’s infrastructure so search engines can crawl, index, and understand your content efficiently. It’s the foundation that makes all your other SEO efforts work.
Think of it this way: you can write the best content in the world, but if Google’s crawlers can’t access your pages, or if your site loads too slowly, that content will never rank.
In 2026, technical SEO matters more than ever because of three major shifts. First, Google now processes sites through mobile-first indexing exclusively, meaning your mobile experience determines your rankings. Second, Core Web Vitals — especially the new INP metric — directly impact how Google evaluates user experience. Third, AI search engines like Google’s AI Overviews, ChatGPT, and Perplexity need clean, structured technical foundations to pull accurate information from your site.
Poor technical SEO creates invisible barriers. Your pages might not get indexed. Your site might be too slow to rank. Your content might be invisible to AI search systems that are reshaping how people find information.
The good news: most technical SEO issues are fixable with systematic checks and the right tools. This checklist walks you through exactly what to fix and how to fix it.
How Google’s 2024–2026 Updates Changed Technical SEO
Google made significant changes between 2024 and 2026 that shifted what “good” technical SEO looks like.
In March 2024, Google’s Core Update strengthened the Helpful Content System, making technical performance inseparable from content quality. Sites with poor Core Web Vitals or indexing issues saw rankings drop even when their content was strong. The message was clear: user experience and technical health now work together, not separately.
The biggest technical change came in March 2024 when Google officially replaced First Input Delay (FID) with Interaction to Next Paint (INP) in Core Web Vitals. FID only measured the first interaction on a page. INP measures all user interactions throughout their visit, giving a more complete picture of responsiveness. Sites that passed FID thresholds often failed INP, requiring new optimization strategies.
Mobile-first indexing became Google’s only indexing method by 2024. If your mobile site is broken, has hidden content, or performs poorly, your desktop version doesn’t matter anymore. Google only sees what mobile users see.
AI search also changed the technical landscape. Google’s AI Overviews, ChatGPT search, and Perplexity AI pull information from websites differently than traditional search. These systems prioritize structured data, clear content hierarchies, and direct answer formats. Technical SEO now includes optimizing for Answer Engine Optimization (AEO) — making sure AI can extract and cite your information accurately.
The Helpful Content Update, integrated into Google’s core ranking systems, penalizes sites that feel automated or lack genuine expertise. This affects technical decisions like content structure, internal linking patterns, and how you organize information.
For 2026, this means your technical SEO checklist must address traditional factors (crawling, indexing, speed) and new factors (INP performance, AI readability, experience signals). The sites that rank well do both.
Essential Technical SEO Tools You Need
You don’t need dozens of tools to audit and fix technical SEO. These six cover everything on this checklist.
Google Search Console is your primary diagnostic tool. It shows exactly which pages Google indexed, which ones failed, crawl errors, Core Web Vitals performance, and mobile usability issues. It’s free and gives you Google’s direct perspective on your site’s technical health. Check it weekly.
Screaming Frog SEO Spider crawls your site like a search engine would, revealing broken links, redirect chains, duplicate content, missing meta tags, and crawl depth issues. The free version handles up to 500 URLs, which works for smaller sites. Use it monthly for full site audits.
PageSpeed Insights measures Core Web Vitals with real user data (field data) and simulated testing (lab data). It shows specific issues slowing your site down and gives prioritized recommendations. Essential for optimizing LCP, CLS, and INP.
Google Analytics 4 tracks user behavior patterns that hint at technical problems. High bounce rates on specific pages, slow page load times, and exit patterns can reveal issues Search Console might miss. Set up event tracking for key interactions to monitor INP.
Chrome DevTools is built into Chrome browser and helps debug rendering issues, check mobile responsiveness, analyze JavaScript errors, and test page speed locally. Press F12 in Chrome to access it. Use it when troubleshooting specific page problems.
Ahrefs Site Audit or Semrush Site Audit (pick one) automates comprehensive technical checks: crawlability, HTTPS issues, internal linking structure, and site health scores. Both have visual reports that make it easier to prioritize fixes. They’re paid tools but offer free trials.
Start with Google Search Console and Chrome DevTools — they’re free and cover 80% of technical issues. Add Screaming Frog for deeper crawls and PageSpeed Insights for performance optimization. Only invest in Ahrefs or Semrush if you manage larger sites or need client reporting.
Check Crawlability: Robots.txt & XML Sitemap Setup
Search engines can’t rank pages they can’t find. Crawlability ensures Google discovers and accesses your important content.
Robots.txt controls which pages search engines can crawl. It’s a text file in your root directory (yoursite.com/robots.txt) that acts like a set of instructions for crawlers. You want it to allow access to important pages while blocking low-value sections like admin areas, duplicate parameter URLs, or staging environments.
Check your robots.txt right now. Visit yoursite.com/robots.txt in your browser. Look for “Disallow” rules that might block important content. Common mistakes include:
- Blocking CSS or JavaScript files (Google needs these to render pages properly)
- Blocking entire important directories like /blog/ or /products/
- Accidentally blocking your entire site with “Disallow: /”
- Blocking mobile versions of pages
If you’re blocking necessary files, remove those rules. A basic robots.txt for most sites looks like this:
User-agent: *
Disallow: /admin/
Disallow: /cart/
Disallow: /*.pdf$
Sitemap: https://yoursite.com/sitemap.xml
XML sitemaps tell search engines which pages you want indexed. Think of it as a roadmap of your most important URLs. Your sitemap should only include canonical URLs — no duplicate versions, no pages blocked by noindex tags, no broken links.
Generate your sitemap through your CMS (WordPress plugins like Yoast or Rank Math create them automatically) or use tools like Screaming Frog. Your sitemap URL is usually yoursite.com/sitemap.xml.
Submit your sitemap to Google Search Console:
- Go to Search Console
- Select “Sitemaps” in the left menu
- Enter your sitemap URL
- Click “Submit”
Check that Google successfully read it. If you see errors, your sitemap might contain blocked URLs, noindexed pages, or incorrect URL formats.
For large sites, break sitemaps into multiple files (one for blog posts, one for products, one for categories). Each sitemap can contain up to 50,000 URLs. Use a sitemap index file to reference all sub-sitemaps.
Crawl budget matters for large sites (10,000+ pages). Google allocates limited resources to crawl your site. If you waste crawl budget on low-value pages — filters, search result pages, duplicate content — important pages might not get crawled regularly.
Check your crawl stats in Search Console under Settings > Crawl Stats. Look for patterns:
- High crawl volume on unimportant pages (faceted navigation, filters)
- Server errors consuming crawl budget
- Redirect chains wasting crawler time
Fix crawl budget waste by:
- Using robots.txt to block parameter URLs and filter pages
- Fixing server errors immediately
- Consolidating redirect chains into direct 301s
- Removing orphaned or outdated pages from your sitemap
Clean crawlability gives Google direct access to your best content without distractions.
Fix Indexing Issues in Google Search Console
Getting crawled doesn’t guarantee getting indexed. Indexing means Google added your page to its searchable database. No index equals no rankings.
Open Google Search Console and check the Index Coverage report (now called “Page Indexing” in newer interfaces). This shows exactly which pages Google indexed and which ones failed.
Look for these common indexing problems:
“Crawled — currently not indexed” means Google found your page but chose not to index it. This usually happens when:
- Content is too thin or low-quality
- Page is duplicate or very similar to other indexed pages
- Page has low internal linking (orphaned or buried deep in site structure)
- Content doesn’t match search intent well
Fix it by improving content quality, adding internal links from important pages, and making sure the page offers unique value. Not every page deserves indexing — support pages, legal disclaimers, or thin category filters might be fine unindexed.
“Discovered — currently not indexed” means Google found the URL (usually in your sitemap or via external links) but hasn’t crawled it yet. This happens on new sites, low-authority sites, or pages buried deep in site architecture.
Fix it by:
- Building internal links to the page from your homepage or high-traffic pages
- Requesting indexing manually in Search Console (search for the URL, click “Request Indexing”)
- Improving site authority through backlinks
“Excluded by noindex tag” means you told Google not to index the page with a noindex meta tag or X-Robots-Tag. If the page should be indexed, remove the noindex directive.
“Redirect error” happens when your redirect chains are too long or create loops. Fix redirect chains so they go directly from old URL to final destination in one hop.
“Server error (5xx)” means your server returned an error when Google tried to crawl. These are critical — they block indexing completely. Check your server logs, increase server resources if needed, and investigate code errors causing 500/503 responses.
“Soft 404” means the page returns a 200 (OK) status code but has no content or very thin content. Google treats it like a 404. Either improve the content or return proper 404 status codes for genuinely deleted pages.
Duplicate content without canonical tags confuses Google about which version to index. Google picks one version (usually not the one you want). Fix this by implementing canonical tags (covered next).
After fixing issues, click “Validate Fix” in Search Console. Google will recheck the URLs and update the status. Validation takes days to weeks depending on your crawl frequency.
Monitor your index coverage weekly. Sudden drops in indexed pages signal technical problems. Steady growth means your fixes are working.
Master Canonical Tags to Control Duplicate Content
Duplicate content happens on almost every website. Product pages accessible through multiple category paths. Print versions of articles. HTTP and HTTPS versions. URL parameters. Pagination.
Google doesn’t penalize duplicate content, but it creates a problem: Google picks which version to index and rank, and it might choose wrong. You lose control over which URL gets traffic and link equity.
Canonical tags tell Google which version is the original. They consolidate ranking signals to your preferred URL even when duplicates exist.
A canonical tag looks like this in your page’s HTML <head>:
<link rel="canonical" href="https://yoursite.com/preferred-version/" />
Every page should have a self-referencing canonical tag (pointing to itself) or point to the master version if it’s a duplicate.
Common duplicate content scenarios and how to fix them:
URL parameters: yoursite.com/shoes?color=red and yoursite.com/shoes?color=blue show the same shoes page with different filters. Set canonical to the main category page: yoursite.com/shoes
Trailing slashes: yoursite.com/blog and yoursite.com/blog/ are technically different URLs. Pick one version (with or without slash) and canonical all variations to it. Be consistent across your site.
HTTPS and HTTP: yoursite.com and https://yoursite.com both exist. Implement HTTPS site-wide (covered later) and canonical everything to the HTTPS version.
WWW and non-WWW: www.yoursite.com versus yoursite.com. Pick one as your preferred domain in Search Console, redirect the other with 301s, and set canonicals accordingly.
Pagination: For paginated content (page 1, page 2, page 3 of results), each page should self-reference its canonical. Don’t canonical all pages to page 1 — that hides pages 2–10 from search. Use rel="prev" and rel="next" tags or let each page stand independently.
Faceted navigation on e-commerce sites: Product filter combinations create thousands of duplicate URLs. Use robots.txt to block parameter URLs, or set canonical tags to the main category page. For important filter combinations (like “women’s running shoes”), allow indexing with unique content.
Syndicated or reprinted content: If you publish content on Medium, LinkedIn, or partner sites, make sure those platforms include a canonical tag pointing back to your original article. Most platforms do this automatically, but verify.
Check canonical implementation in Screaming Frog:
- Crawl your site
- Go to the “Directives” tab > “Canonical”
- Look for missing canonicals, non-indexable canonicals, or canonicals pointing to redirected URLs
Common canonical mistakes:
- Canonical pointing to a 404 page
- Canonical pointing through a redirect (should go directly to final destination)
- Multiple canonical tags on one page (only the first counts)
- Canonical in the page body instead of the
<head>(won’t work)
For WordPress, Yoast SEO and Rank Math handle canonicals automatically. For custom sites, implement canonical tags in your templates.
Proper canonicals give you control over which pages rank and consolidate link authority to your preferred URLs.
Optimize Core Web Vitals (LCP, CLS, INP)
Core Web Vitals measure real user experience through three metrics: Largest Contentful Paint (LCP), Cumulative Layout Shift (CLS), and Interaction to Next Paint (INP). Google uses these as ranking factors, and according to Google’s Core Web Vitals documentation, they directly impact how users experience your site.
Largest Contentful Paint (LCP) measures how long it takes for your page’s largest visible element (usually a hero image, video, or large text block) to load. Good LCP is 2.5 seconds or faster.
Fix slow LCP by:
- Optimizing your largest image: compress it, use WebP format instead of JPEG/PNG, and size it appropriately (don’t load a 3000px image when users only see 800px)
- Implementing lazy loading for images below the fold, but NOT for your LCP element
- Preloading your LCP resource with
<link rel="preload">in your HTML head - Reducing server response time (covered under TTFB later)
- Eliminating render-blocking JavaScript and CSS above the fold
- Using a CDN to serve images faster globally
Cumulative Layout Shift (CLS) measures visual stability — how much elements move around while the page loads. Good CLS is 0.1 or lower. If you’ve ever tried clicking a button and it moved right before you tapped, causing you to click the wrong thing, that’s layout shift.
Fix CLS by:
- Setting width and height attributes on all images and videos (reserves the space before they load)
- Reserving space for ads or dynamic content with min-height CSS
- Avoiding inserting content above existing content (like banner announcements that push everything down)
- Using font-display: swap carefully — switching from system fonts to web fonts can cause layout shifts
- Loading fonts with link rel=”preload” to avoid font swaps
Interaction to Next Paint (INP) replaced First Input Delay in March 2024 and measures how quickly your page responds to all user interactions throughout their visit — clicks, taps, keyboard inputs. Good INP is 200 milliseconds or less.
INP is often the hardest Core Web Vital to pass because it measures responsiveness over the entire page session, not just first load. Heavy JavaScript execution blocks interactions.
Fix poor INP by:
- Breaking up long JavaScript tasks into smaller chunks (tasks over 50ms block the main thread)
- Deferring non-critical JavaScript with
deferorasyncattributes - Removing unused JavaScript (check Chrome DevTools Coverage tool)
- Optimizing third-party scripts — analytics, ads, chat widgets often slow interactions
- Using code splitting to load only necessary JavaScript per page
- Minimizing main thread work during user interactions
How to measure Core Web Vitals:
Use PageSpeed Insights for both field data (real user measurements from Chrome UX Report) and lab data (simulated testing). Field data shows what real users experience; lab data helps diagnose specific issues.
Check Search Console’s Core Web Vitals report for site-wide performance grouped by URL patterns. This shows which page types fail most often.
Install the Web Vitals Chrome extension to see LCP, CLS, and INP scores while browsing your own site.
Priority fixes:
Start with LCP — it’s usually the easiest to fix and gives the biggest user experience improvement. Optimize your hero images and reduce server response time first.
Then tackle CLS by adding image dimensions and reserving space for dynamic content.
INP is the hardest. If you’re failing INP, audit third-party scripts first — they’re often the biggest culprits.
Core Web Vitals affect both rankings and user satisfaction. Pages that pass all three metrics have lower bounce rates and higher engagement than slow pages.
Mobile-First Indexing: What You Must Fix Now
Google uses only your mobile site for indexing and ranking. Your desktop version doesn’t matter if your mobile version is broken.
Mobile-first indexing has been Google’s default since 2019 and became the only indexing method in 2024. If mobile users can’t access content, Google can’t index it.
Check if you have mobile usability issues:
- Open Google Search Console
- Go to “Mobile Usability” report
- Look for errors like “Text too small to read,” “Clickable elements too close together,” or “Content wider than screen”
Critical mobile fixes:
Use responsive design. Your site should automatically adjust to any screen size. Responsive design uses CSS media queries to reflow content based on viewport width. Avoid separate mobile URLs (m.yoursite.com) and dynamic serving — they create maintenance headaches and duplicate content issues.
Add the viewport meta tag to every page’s <head>:
<meta name="viewport" content="width=device-width, initial-scale=1.0">
Without this, mobile browsers render your desktop site in a tiny viewport and force users to pinch-zoom.
Make text readable without zooming. Base font size should be at least 16px. Line height should be 1.5 times the font size. Contrast ratio between text and background should be at least 4.5:1 for body text.
Size tap targets properly. Buttons, links, and form fields should be at least 48×48 pixels with spacing between them. Tiny links close together cause mis-taps.
Avoid intrusive interstitials. Full-page popups that cover main content on mobile annoy users and violate Google’s guidelines. If you use popups, make them easy to dismiss, appear after users engage with content, or use smaller banners instead.
Content parity between mobile and desktop is critical. Don’t hide important content on mobile to save space. Google only sees what mobile users see. If key sections, text, or internal links exist only on desktop, Google misses them.
Common content parity issues:
- Accordions or tabs that hide content by default (make sure the content is in the HTML, not loaded only when clicked)
- Images blocked on mobile with
display: nonein CSS - Different product descriptions on mobile versus desktop
- Navigation links available only on desktop
Test mobile rendering in Chrome DevTools:
- Press F12 to open DevTools
- Click the device toolbar icon (or press Ctrl+Shift+M)
- Select different mobile devices from the dropdown
- Check for horizontal scrolling, overlapping text, or broken layouts
Use Google’s Mobile-Friendly Test to see how Google renders your mobile pages. It shows screenshots and lists issues.
Check your mobile page speed separately from desktop in PageSpeed Insights. Mobile scores are usually lower because mobile networks and devices are slower. Optimize images and scripts specifically for mobile.
If your mobile traffic is growing but rankings aren’t, mobile usability issues are likely the cause. Fix them now — Google sees only your mobile site.
HTTPS, Security & Clean URL Structure
Secure sites rank better and build user trust. HTTPS encrypts data between your server and users’ browsers, protecting sensitive information.
Implement HTTPS site-wide. Get an SSL/TLS certificate from your hosting provider (most include free Let’s Encrypt certificates) or certificate authorities like Cloudflare, DigiCert, or Sectigo. Install it on your server.
After installing your SSL certificate:
Redirect all HTTP traffic to HTTPS using 301 redirects. Add this to your .htaccess file (Apache) or server config (Nginx):
Apache (.htaccess):
RewriteEngine On
RewriteCond %{HTTPS} off
RewriteRule ^(.*)$ https://%{HTTP_HOST}%{REQUEST_URI} [L,R=301]
This ensures anyone typing yoursite.com gets redirected to https://yoursite.com.
Update all internal links to use HTTPS. Check your site for hardcoded HTTP links in navigation, footer, and content. Mixed content (HTTPS page loading HTTP resources) triggers browser warnings and breaks the secure connection.
Find mixed content issues:
- Open Chrome DevTools > Console tab
- Look for “Mixed Content” warnings
- Fix by updating image, script, and stylesheet URLs to HTTPS or relative paths (/images/photo.jpg instead of http://yoursite.com/images/photo.jpg)
Set HTTPS as preferred version in Google Search Console:
- Old Search Console: Settings > Site Settings
- New Search Console: This is automatic once you set up an HTTPS property
Update your XML sitemap to include HTTPS URLs only. Submit the updated sitemap to Search Console.
Clean URL structure makes your site easier to crawl and understand.
Use hyphens to separate words in URLs, not underscores: yoursite.com/blue-shoes (good) versus yoursite.com/blue_shoes (bad). Google treats hyphens as word separators; underscores connect words.
Keep URLs short and descriptive: yoursite.com/blog/technical-seo-checklist is better than yoursite.com/p=12345?category=seo&type=article
Avoid unnecessary parameters. URL parameters like ?sessionid=xyz or ?ref=email create duplicate content and make URLs harder to share. Use URL rewriting to create clean paths.
Use lowercase URLs. yoursite.com/Blog and yoursite.com/blog are different URLs. Stick to lowercase to avoid duplication.
Organize URLs hierarchically to show content relationships: yoursite.com/blog/seo/technical-seo-checklist indicates this is an SEO article within your blog.
Don’t change URLs unnecessarily. Every URL change requires a 301 redirect and risks losing rankings temporarily. If you must restructure, plan redirects carefully.
Security and clean URLs are foundation elements that affect crawlability, user trust, and ranking potential. Fix them once and move on to other optimizations.
Implement Structured Data for Rich Results & AI Search
Structured data is code that tells search engines exactly what your content means. It helps you appear in rich results — enhanced search listings with extra features like star ratings, images, FAQs, or event dates.
More importantly for 2026, structured data helps AI search systems like Google’s AI Overviews, ChatGPT, and Perplexity understand and cite your content accurately. This is the foundation of Answer Engine Optimization (AEO).
Use JSON-LD format for structured data. It’s the easiest to implement and Google’s recommended format. JSON-LD goes in your page’s <head> section and doesn’t affect visible content.
Priority schema types to implement:
Organization schema (for your homepage): Tells search engines your business name, logo, social profiles, and contact info. Helps Google display your brand correctly in knowledge panels.
{
  "@context": "https://schema.org",
  "@type": "Organization",
  "name": "Your Company Name",
  "url": "https://yoursite.com",
  "logo": "https://yoursite.com/logo.png",
  "sameAs": [
    "https://facebook.com/yourpage",
    "https://twitter.com/yourhandle"
  ]
}
Article schema (for blog posts and news): Marks your content as news or articles, helping Google understand publication dates, authors, and article structure. Required for appearing in Google News.
FAQ schema (for pages with questions and answers): Displays your Q&A directly in search results as expandable rich snippets. Great for capturing featured snippets and AI search citations.
Product schema (for e-commerce): Shows prices, availability, reviews, and ratings in search results. Essential for shopping visibility.
Local Business schema (for local companies): Displays your address, hours, phone number, and reviews in local search and Google Maps.
Breadcrumb schema: Shows your site hierarchy in search results (Home > Category > Product), helping users understand page context.
Review schema: Displays star ratings in search results, increasing click-through rates dramatically.
How to implement structured data:
For WordPress, use plugins like Schema Pro, Rank Math, or Yoast SEO (premium). They generate schema automatically based on your content.
For custom sites, use the free Schema Generator tool to create JSON-LD code for your pages. Paste the generated code into your page’s <head> section.
Reference official schema types at Schema.org for complete markup vocabulary and examples.
Test your structured data:
Use Google’s Rich Results Test to validate markup and see how it appears in search. Enter your URL and check for errors or warnings.
Check the “Enhancements” report in Google Search Console to see which rich results you’re eligible for and which have errors.
Optimize structured data for AI search:
AI systems rely heavily on structured data to extract accurate information. When ChatGPT or Perplexity cites your content, clear schema helps them attribute information correctly.
For AI Overviews optimization:
- Use FAQ schema to provide direct answers to common questions
- Implement Article schema with clear headline and author information
- Add Review schema to establish authority and trust signals
- Structure content hierarchically so AI can extract key points easily
Common structured data mistakes:
- Marking up content not visible on the page (violates Google’s guidelines)
- Using incorrect schema types (marking a blog post as Product schema)
- Leaving required properties empty (like missing “offers” in Product schema)
- Implementing schema but never testing or monitoring for errors
Monitor structured data performance:
Check Search Console’s Enhancements report monthly for:
- Error increases (usually from template changes)
- Valid rich results counts (should grow as you add schema)
- Click-through rate improvements on pages with rich results
Pages with structured data typically see 20–30% higher click-through rates than plain blue links. For AI search visibility, structured data is becoming mandatory, not optional.
Fix Broken Links & Redirect Chains
Broken links hurt user experience and waste crawl budget. Link equity from internal and external links flows nowhere when pages return 404 errors.
Find broken links using Screaming Frog:
- Crawl your site
- Go to “Response Codes” tab > “Client Error (4xx)” tab
- Click “Inlinks” to see which pages link to the broken URL
- Export the list
Fix broken internal links by:
- Updating the link to point to the correct, working page
- Implementing a 301 redirect from the broken URL to the correct destination
- Removing the link entirely if the target page no longer exists and has no replacement
Handle external links to your site (backlinks pointing to deleted pages):
- Create 301 redirects from old URLs to relevant new pages
- If the old page had strong backlinks, create replacement content rather than deleting
- Use 410 status codes (Gone) only for pages that should never return and have no logical replacement
Redirect chains happen when one redirect leads to another redirect before reaching the final destination:
yoursite.com/old-page → yoursite.com/medium-page → yoursite.com/new-page
This wastes crawl budget, dilutes link equity, and slows page load times.
Find redirect chains in Screaming Frog:
- Crawl your site
- Go to “Response Codes” > “Redirection (3xx)”
- Look for URLs with redirect chains listed
Fix redirect chains by updating all redirects to point directly to the final destination:
yoursite.com/old-page → yoursite.com/new-page (skip the middle step)
Use 301 redirects for permanent moves, not 302 (temporary) redirects. 301s pass link equity; 302s don’t signal permanence to search engines.
When to use 404 versus 410:
- Use 404 (Not Found) for pages temporarily unavailable or URLs that never existed (typos, wrong links)
- Use 410 (Gone) for pages permanently deleted with no replacement — product no longer sold, event that ended, or content purposely removed
Google stops crawling 410 pages faster than 404s. But only use 410 when you’re certain the page will never return.
Broken link prevention:
- Before deleting any page, check if it has inbound links (internal or external) in Screaming Frog or Ahrefs
- Create 301 redirects before deletion
- Monitor Search Console’s “Not found (404)” report monthly for new broken links
- Implement custom 404 pages that guide users to working content instead of dead ends
External broken links (links from your site to other sites): Find them in Screaming Frog under External > Response Codes. Fix by:
- Updating to the current working URL
- Finding an alternative resource if the original site shut down
- Removing the link if no replacement exists
Broken links signal poor site maintenance to both users and search engines. A site audit should find fewer than 1% broken links among your total pages.
Build Strategic Internal Linking Architecture
Internal links distribute authority across your site, help users discover content, and show search engines which pages are most important.
Think of your site as a network. Pages with many internal links pointing to them signal importance to Google. Orphan pages — pages with zero internal links — are invisible in search even if they’re in your sitemap.
Core internal linking principles:
Hub and spoke model: Create pillar pages (comprehensive guides on broad topics) that link to related cluster content (specific subtopics). Each cluster page links back to the pillar.
Example:
- Pillar: “Complete Technical SEO Guide” (this article)
- Spokes: “Core Web Vitals Optimization,” “Mobile-First Indexing,” “Structured Data Implementation”
This creates topical authority clusters that help Google understand your expertise in specific areas.
Use descriptive anchor text that tells users and search engines what the linked page is about. “Click here” tells Google nothing; “technical SEO audit checklist” clearly describes the destination.
Avoid over-optimization. Don’t use the exact same keyword-rich anchor text 50 times across your site — it looks manipulative. Vary anchor text naturally.
Link from high-authority pages (homepage, popular blog posts) to pages that need ranking help. Authority flows from well-linked pages to those they reference.
Check your link depth. Important pages should be reachable within 3 clicks from your homepage. Pages buried 6–7 clicks deep rarely rank well — Google sees them as less important.
Use Screaming Frog to check crawl depth:
- Crawl your site
- Add “Crawl Depth” column in the main window
- Filter by pages with depth 4+
- Add internal links from higher-level pages to reduce depth
Navigation linking best practices:
- Main navigation should link to your most important pages (top categories, key services)
- Footer links can reach legal pages, contact info, and secondary categories
- Breadcrumb navigation creates automatic hierarchical linking
- Related posts sections distribute links across blog content
Avoid these internal linking mistakes:
- Linking to redirect URLs (link directly to the final destination)
- Linking to noindexed pages (wastes authority)
- Creating link loops (Page A links to B, B links to C, C links back to A)
- Using JavaScript-only links that search engines can’t follow (use
<a href="">tags)
Find orphan pages:
In Screaming Frog:
- Crawl your site
- Export crawled URLs
- Compare to your sitemap URLs
- Pages in sitemap but not crawled are orphans (no internal links pointing to them)
Fix orphans by adding contextual links from related content, category pages, or sitemaps (HTML sitemaps, not just XML).
Internal linking for topical authority:
Google increasingly ranks sites that demonstrate deep expertise in specific topics. Build this by:
- Creating comprehensive content clusters on your core topics
- Interlinking all content within each cluster
- Using consistent terminology across the cluster
- Adding internal links from new content to older foundational pieces
Check your internal link distribution in Screaming Frog:
- Go to “Internal” tab
- Sort by “Inlinks” column
- Look for imbalances — some pages with 50+ links, others with 1–2
Ideally, your most important pages have the most internal links, and your structure follows a logical pyramid (few high-authority pages at top, many specific pages below).
For tool support with building strategic link structures, use this free Keyword Idea Generator to find related topics for cluster building.
Internal linking is one of the few ranking factors you control completely. Use it strategically.
Optimize Page Speed Beyond Core Web Vitals
Core Web Vitals measure user-facing performance, but other speed factors affect how search engines crawl your site and how users perceive quality.
Time to First Byte (TTFB) measures how long it takes your server to send the first byte of data after a user requests a page. Good TTFB is under 200 milliseconds.
Slow TTFB indicates server problems:
- Slow database queries
- Unoptimized server software
- Cheap shared hosting without enough resources
- No server-side caching
- Too many redirects before the server responds
Fix TTFB by:
- Upgrading to better hosting (VPS or dedicated servers for high-traffic sites)
- Implementing server-side caching (Redis, Memcached, or Varnish)
- Optimizing database queries (add indexes, remove unnecessary joins)
- Using a CDN to serve cached content from servers closer to users
- Reducing server-side processing on initial page load
Image optimization is the fastest way to improve page speed:
- Compress images using tools like TinyPNG or ImageOptim before uploading
- Use modern formats: WebP instead of JPEG/PNG (30–50% smaller file sizes)
- Size images appropriately — don’t load 3000px images when users see 800px
- Implement lazy loading for images below the fold:
<img loading="lazy"> - Use responsive images with
srcsetto serve different sizes based on device
CDN (Content Delivery Network) stores cached copies of your static files (images, CSS, JavaScript) on servers worldwide. Users load files from the nearest server, reducing latency.
Popular CDNs: Cloudflare (free tier available), AWS CloudFront, Fastly, BunnyCDN.
Minification removes unnecessary characters from CSS and JavaScript files (whitespace, comments, long variable names) without changing functionality. This reduces file sizes by 20–40%.
WordPress plugins like WP Rocket or Autoptimize handle minification automatically. For custom sites, use build tools like Webpack or Gulp.
Browser caching tells browsers to store static files locally so returning visitors don’t re-download everything. Set cache expiration headers in your server config:
Apache (.htaccess):
<IfModule mod_expires.c>
  ExpiresActive On
  ExpiresByType image/jpg "access plus 1 year"
  ExpiresByType image/png "access plus 1 year"
  ExpiresByType text/css "access plus 1 month"
  ExpiresByType application/javascript "access plus 1 month"
</IfModule>
Gzip compression reduces text file sizes (HTML, CSS, JavaScript) by 70–90% during transfer. Enable it in your server config or through hosting control panel.
Defer non-critical JavaScript so it loads after the main content renders. Add defer attribute to script tags:
<script src="non-critical.js" defer></script>
For scripts that don’t need to run immediately, use async instead.
Critical rendering path optimization means loading only essential resources first, deferring everything else:
- Inline critical CSS (styles needed for above-the-fold content) directly in HTML
- Defer non-critical CSS
- Load JavaScript after content renders
- Preload critical resources with
<link rel="preload">
Reduce third-party script impact:
Analytics, ads, social widgets, and chat tools often slow pages more than your own code. Audit third-party scripts in Chrome DevTools:
- Open DevTools > Network tab
- Reload page
- Sort by “Size” or “Time”
- Identify heavy third-party resources
Options:
- Load third-party scripts asynchronously
- Remove unnecessary widgets
- Use lighter alternatives (Plausible or Fathom instead of Google Analytics)
- Lazy load third-party embeds (YouTube videos, social feeds)
Font optimization:
- Limit font families to 2–3 maximum
- Use only needed font weights (regular, bold) instead of loading entire font families
- Use
font-display: swapto prevent invisible text during font load - Self-host fonts instead of loading from Google Fonts for faster delivery
Check page speed improvements in PageSpeed Insights after each optimization. Focus on the recommendations with the highest impact scores first.
Speed affects everything: crawl efficiency, user satisfaction, conversion rates, and rankings. A 1-second delay in page load can reduce conversions by 7%.
Handle International SEO with Hreflang Tags
Hreflang tags tell search engines which language or regional version of a page to show users based on their location and language settings.
Without hreflang, Google might show the wrong language version of your content to users, or treat translated versions as duplicate content.
When to use hreflang:
- You have the same content in multiple languages (English, Spanish, French)
- You have regional variations for the same language (UK English vs. US English)
- You have different currency or pricing by region
Hreflang tag format:
In HTML <head>:
<link rel="alternate" hreflang="en-us" href="https://yoursite.com/en-us/page/" />
<link rel="alternate" hreflang="en-gb" href="https://yoursite.com/en-gb/page/" />
<link rel="alternate" hreflang="es" href="https://yoursite.com/es/page/" />
<link rel="alternate" hreflang="x-default" href="https://yoursite.com/page/" />
Key hreflang rules:
Every page needs self-referencing hreflang. The English page must include an hreflang tag pointing to itself.
Hreflang must be bidirectional. If the US English page links to the UK English page, the UK page must link back to the US page.
Use ISO language codes: “en” for English, “es” for Spanish, “fr” for French. Add region codes when needed: “en-us” for US English, “en-gb” for UK English, “es-mx” for Mexican Spanish.
Include x-default for catch-all: The x-default tag specifies which page to show users whose language/region doesn’t match any hreflang tags. Usually points to your primary language version.
Common hreflang mistakes:
- Using incorrect language/region codes (use “en-gb” not “en-uk”)
- Missing return links (not bidirectional)
- Pointing to redirect URLs or noindexed pages
- Mixing hreflang implementations (HTML, XML sitemap, and HTTP headers — pick one method)
Implementation methods:
HTML tags (recommended for small sites): Add hreflang tags to each page’s <head>. Easy to implement but hard to maintain at scale.
XML sitemap: Include hreflang annotations in your sitemap. Better for large sites with many language versions.
HTTP headers: Use for non-HTML files (PDFs). Add hreflang in server response headers.
Test hreflang implementation:
Use the Hreflang Tag Assistant tool to validate your hreflang setup, check for missing return links, and identify errors.
Check Google Search Console’s “International Targeting” report for hreflang errors.
Monitor in Search Console:
Hreflang errors appear under “Coverage” or “Page indexing” reports with specific messages like “No return tag” or “Incorrect hreflang.”
Fix errors immediately — broken hreflang can cause the wrong language version to rank, confusing users and reducing engagement.
For multi-language sites, hreflang is essential to avoid duplicate content issues and ensure users see content in their preferred language.
Advanced: Crawl Budget Optimization & Log File Analysis
Crawl budget is how many pages Google crawls on your site in a given timeframe. For sites under 10,000 pages, crawl budget usually isn’t an issue — Google crawls everything frequently.
For large sites (50,000+ pages), crawl budget optimization prevents Google from wasting time on low-value pages while missing important content.
Crawl budget depends on two factors:
Crawl demand: How often Google thinks your pages need recrawling based on update frequency and popularity.
Crawl limit: How much load your server can handle without slowing down.
Check crawl stats in Google Search Console:
Go to Settings > Crawl Stats. This shows:
- Total requests per day
- Total download size
- Average response time
- Crawl by response code (200s, 301s, 404s)
- Crawl by purpose (discovery vs refresh)
- Crawl by Googlebot type (smartphone vs desktop)
Look for patterns:
- Are most crawls hitting low-value pages like filters, search results, or outdated content?
- Is response time increasing (server slowdown)?
- Are 404 errors consuming significant crawl budget?
Optimize crawl budget by:
Block low-value URLs in robots.txt:
- Faceted navigation (filter combinations)
- Internal search result pages
- Duplicate parameter URLs
- Printer-friendly versions
- Calendar archives beyond current year
Fix crawl errors immediately. Server errors (5xx) waste crawl budget because Google keeps retrying. Monitor Search Console for 500 errors and fix server issues.
Reduce redirect chains. Each redirect step consumes crawl budget. Consolidate chains into direct 301s.
Update sitemaps frequently. When you publish new content, update your XML sitemap and ping Search Console. This signals Google to crawl new pages rather than recrawling unchanged content.
Use proper pagination or infinite scroll. Don’t create hundreds of paginated pages if you can use “Load More” with JavaScript. If you do paginate, limit to reasonable numbers (1–50 pages, not thousands).
Canonical consolidation. Canonicalize duplicate URLs to reduce crawled variants.
Avoid orphan pages. Pages with no internal links rarely get crawled. Add strategic links to make important content discoverable.
Log file analysis gives deeper insights into how search engines crawl your site. Server logs record every request to your site, including all bot traffic.
What log file analysis reveals:
- Which pages Googlebot crawls most frequently
- Pages Google ignores despite being in your sitemap
- Crawl budget waste on unimportant pages
- Bot behavior differences (Google vs Bing vs SEO tools)
- Server errors affecting crawlability
How to analyze log files:
Download server logs from your hosting provider (usually in Apache or Nginx format). Use log analysis tools:
- Screaming Frog Log File Analyzer (free)
- OnCrawl
- Botify
- ContentKing
Filter logs to show only Googlebot traffic. Look for:
- Crawl frequency per URL pattern
- Response codes (200, 301, 404, 5xx)
- Pages crawled but not indexed
- Orphan pages being crawled (indicates external links)
Actionable insights from log analysis:
If Google crawls outdated blog posts daily but ignores new products, improve internal linking to products and reduce unnecessary old content.
If you see heavy crawls of filter pages, block them in robots.txt.
If important pages aren’t getting crawled weekly, boost internal links to them.
Log file analysis is advanced and most valuable for enterprise sites, e-commerce with thousands of products, or sites with known indexing issues. Small sites can skip this unless experiencing severe crawl problems.
Make Your Site AI Search Ready (SGE, ChatGPT, Perplexity)
AI search engines — Google’s AI Overviews, ChatGPT, Perplexity, and others — are changing how people find information. These systems don’t just return 10 blue links; they synthesize answers from multiple sources and display them directly.
Traditional SEO focused on ranking for keywords. Answer Engine Optimization (AEO) focuses on being the source AI systems cite and quote.
How AI search differs from traditional search:
Traditional search ranks pages. AI search extracts and combines information from pages to create answers. You want AI to use your content as source material, even if users never click through.
AI systems prioritize:
- Clear, structured content that directly answers questions
- Authoritative sources with expertise signals
- Content formatted for extraction (lists, tables, definitions)
- Sites with strong entity associations and topical authority
Technical optimizations for AI search:
Implement comprehensive structured data (covered earlier). AI systems rely heavily on schema markup to understand content meaning and relationships. FAQ, Article, and HowTo schema are especially valuable for AI citations.
Use clear content hierarchies. Organize information with descriptive headings (H1, H2, H3) that form an outline. AI can extract key points from well-structured content more accurately.
Format direct answers clearly. When answering questions, put the concise answer in the first paragraph, then elaborate. AI systems extract these lead answers.
Example: “What is technical SEO? Technical SEO is the practice of optimizing your website’s infrastructure so search engines can crawl, index, and understand your content efficiently. It includes…”
Build topical authority. AI systems favor sources that demonstrate deep expertise in specific areas. Create comprehensive content clusters (pillar pages + supporting articles) on your core topics.
Add context and definitions. AI needs to understand terms to cite your content correctly. When mentioning technical concepts, briefly define them or use structured data to clarify meaning.
Create citation-worthy content. AI systems look for:
- Original research and data
- Expert quotes and insights
- Clear attribution for claims (“According to Google’s 2024 documentation…”)
- Specific facts, statistics, and dates
- Content that agrees with authoritative sources on core facts
Optimize for featured snippet formats because AI systems extract similar content:
- Numbered lists for process steps
- Bulleted lists for options or features
- Tables for comparisons
- Definition paragraphs for “what is” queries
Use entity-based content organization. Instead of just targeting keywords, focus on entities — people, places, things, concepts. Clearly define entities and their relationships using schema markup and descriptive text.
Technical signals AI systems evaluate:
Site authority: Backlinks, domain age, author credentials (E-E-A-T signals)
Content freshness: Recently updated content ranks higher for time-sensitive topics
User engagement: High time-on-page, low bounce rates, strong social signals
Accessibility: Clean HTML, semantic markup, mobile-friendly design
Security: HTTPS, privacy policies, transparent contact information
Monitor AI search visibility:
Track when AI systems cite your content:
- Search your brand name + key topics in ChatGPT, Perplexity, and Google AI Overviews
- Look for citations to your URLs in AI responses
- Monitor referral traffic from AI search tools in Google Analytics
Content strategies for AI search:
Answer questions comprehensively. AI favors long-form, detailed content that covers topics thoroughly.
Use conversational language. AI systems train on natural language and favor content that reads naturally, not keyword-stuffed SEO writing.
Update content regularly. AI systems check publication and update dates. Refresh important articles annually.
Build author authority. Author bios, credentials, and bylines help AI systems evaluate expertise.
AI search is opportunity, not threat. Yes, fewer users click through when AI answers their questions directly. But being cited builds brand authority, and users with complex needs still click sources. Optimize for both scenarios: direct AI citations for visibility and compelling content that drives clicks when users need more depth.
The shift to AI search rewards sites that focus on genuine expertise, clear communication, and structured information — exactly what technical SEO enables.
Track Technical SEO Health: Monitoring & Maintenance
Technical SEO isn’t one-and-done. Sites change, Google updates algorithms, and new issues emerge. Regular monitoring catches problems before they hurt rankings.
Weekly monitoring tasks:
Check Google Search Console:
- Index Coverage report for new errors
- Core Web Vitals for performance regressions
- Manual actions (rare but critical if they appear)
- Security issues
Set up email alerts in Search Console so Google notifies you immediately when critical issues appear.
Monitor crawl errors. Look for sudden increases in 404s, server errors, or blocked URLs. These indicate broken pages, server problems, or configuration mistakes.
Monthly audit tasks:
Run Screaming Frog site crawl:
- Compare total URLs crawled to previous month (sudden changes indicate issues)
- Check for new broken links
- Verify canonical implementation
- Review redirect chains
- Identify orphan pages
Review Core Web Vitals trends in Search Console. Look for:
- URLs failing thresholds that previously passed (performance regression)
- Specific page templates with consistent issues
- Mobile vs desktop performance gaps
Check structured data errors in Search Console’s Enhancements report. New errors usually come from template changes or plugin updates.
Monitor site speed in PageSpeed Insights for your most important pages. Test:
- Homepage
- Top traffic landing pages
- Main conversion pages
- Mobile and desktop separately
Review indexing status. Compare total indexed pages to your sitemap. Large discrepancies indicate crawl or quality issues.
Quarterly deep audits:
Full technical SEO crawl with Screaming Frog or enterprise tools (Ahrefs, Semrush). Export and analyze:
- All response codes (404s, 301s, 500s)
- Internal link distribution
- Duplicate content clusters
- XML sitemap accuracy
- Robots.txt effectiveness
Log file analysis (for larger sites) to understand Googlebot crawl patterns and identify wasted crawl budget.
Competitive technical analysis. Check top-ranking competitors’ technical SEO:
- Their Core Web Vitals scores
- Structured data implementation
- Site speed vs yours
- Mobile experience quality
Identify gaps where competitors have technical advantages.
Automated monitoring tools:
Google Search Console (free): Core tool for indexing, crawl, and performance data
Ahrefs Site Audit or Semrush Site Audit: Automated weekly/monthly crawls with trend tracking and alerts
Uptime monitoring (Pingdom, UptimeRobot): Alerts when your site goes down
PageSpeed monitoring (Lighthouse CI, SpeedCurve): Tracks Core Web Vitals trends over time
Create an issue prioritization system:
Critical (fix immediately):
- Site down or major pages returning errors
- Manual actions or security warnings in Search Console
- Sudden indexing drops (50%+ pages deindexed)
- HTTPS errors or expired certificates
High (fix this week):
- Core Web Vitals failures on important pages
- Broken internal links on high-traffic pages
- Structured data errors affecting rich results
- Major redirect chains
Medium (fix this month):
- Minor broken links
- Missing alt text on images
- Orphan pages that should be linked
- Slow-loading pages not in top traffic tier
Low (ongoing improvement):
- Crawl budget optimization
- Consolidating very old redirect chains
- Optimizing images on low-traffic pages
Document your technical SEO baseline:
Create a spreadsheet with:
- Total pages indexed
- Average Core Web Vitals scores
- Number of broken links
- Structured data coverage
- Mobile usability errors
Track these metrics monthly. Trends matter more than absolute numbers. Sudden changes signal problems.
Maintain a technical SEO calendar:
- Weekly: Search Console check
- Monthly: Screaming Frog crawl + Core Web Vitals review
- Quarterly: Full technical audit + competitive analysis
- After major changes: Immediate audit (site migrations, redesigns, CMS updates)
Technical SEO maintenance prevents small issues from becoming ranking disasters. A site that was perfect six months ago can develop problems from plugin updates, content changes, or hosting issues. Regular monitoring keeps everything running smoothly.
Frequently Asked Questions
What is technical SEO and why does it matter in 2026?
Technical SEO is the practice of optimizing your website’s infrastructure — server setup, code, site architecture, and performance — so search engines can crawl, index, and understand your content efficiently. It’s the foundation that makes your content discoverable and rankable.
In 2026, technical SEO matters more than ever because Google evaluates user experience as a ranking factor through Core Web Vitals, especially the new INP metric. Mobile-first indexing means your mobile site determines rankings. AI search systems like Google’s AI Overviews, ChatGPT, and Perplexity require clean structured data and clear content hierarchies to cite your content accurately. Without solid technical SEO, even exceptional content remains invisible in both traditional and AI search results.
How often should I run a technical SEO audit?
Run lightweight audits monthly and comprehensive audits quarterly. Your monthly check should include reviewing Google Search Console for indexing errors, checking Core Web Vitals performance, and scanning for broken links with Screaming Frog. This catches emerging issues before they hurt rankings.
Quarterly deep audits should include full site crawls, redirect chain analysis, structured data validation, log file review for larger sites, and competitive technical analysis. Also run immediate audits after major changes like site migrations, redesigns, hosting moves, or CMS updates — these changes often introduce technical errors that need quick fixes.
What’s the difference between INP and FID in Core Web Vitals?
First Input Delay (FID) measured only the first interaction a user had with your page — like clicking a button or tapping a link. Interaction to Next Paint (INP) measures responsiveness for all interactions throughout the entire page visit, not just the first one.
Google replaced FID with INP in March 2024 because INP provides a more complete picture of user experience. A page might respond quickly to the first click but lag on subsequent interactions — FID would pass, but INP catches this problem. INP measures the delay between user actions and visual updates, with a good score being 200 milliseconds or less. Sites that passed FID often struggle with INP because they need to optimize JavaScript execution throughout the page lifecycle, not just at initial load.
Can technical SEO issues prevent my content from ranking?
Yes, absolutely. Technical issues create hard barriers that stop even great content from ranking. If Google can’t crawl your pages because of robots.txt blocks or server errors, they won’t appear in search results at all. If pages aren’t indexed due to noindex tags or duplicate content without canonicals, they’re invisible to search engines.
Even if pages are indexed, technical problems hurt rankings. Failing Core Web Vitals means Google views your user experience as poor. Slow page speed increases bounce rates. Broken mobile experiences lose mobile-first indexing advantages. No structured data means you miss rich results and AI search citations. Technical SEO creates the foundation — content quality determines how well you rank once the technical foundation is solid, but without that foundation, content can’t perform.
Do I need different technical SEO for AI search engines?
Core technical SEO fundamentals apply to both traditional and AI search engines — clean crawling, proper indexing, fast performance, and mobile-friendly design work for all systems. However, AI search engines prioritize certain technical elements more heavily.
For AI Overviews, ChatGPT, and Perplexity, emphasize comprehensive structured data implementation (FAQ, Article, HowTo schema), clear content hierarchies with descriptive headings, direct answer formatting in opening paragraphs, and citation-worthy content with sources and data. AI systems extract information from well-structured content more accurately than loosely organized pages. Build topical authority through content clusters rather than isolated articles. Use entity-based content organization and define technical terms clearly. AI search rewards sites that make information extraction easy through clean code, semantic HTML, and structured data — exactly what good technical SEO delivers.
What’s the #1 technical SEO priority for 2026?
Ensuring clean indexing is the foundation — all your important pages must be indexed with no technical blocks, combined with passing Core Web Vitals thresholds, especially the new INP metric. If Google can’t index your pages or views them as providing poor user experience, nothing else matters.
Start by checking Google Search Console’s Page Indexing report. Fix any pages marked “Crawled — currently not indexed” or “Discovered — currently not indexed” by improving content quality, adding internal links, and removing technical barriers. Then optimize Core Web Vitals — use PageSpeed Insights to identify performance issues and prioritize fixes for LCP, CLS, and INP. These two priorities — indexing and Core Web Vitals — directly impact whether your pages can rank and whether they will rank well. Master these before diving into advanced optimizations.
How do I know if my robots.txt is blocking important pages?
Check your robots.txt file directly by visiting yoursite.com/robots.txt in your browser. Look for “Disallow” rules that might block important content. Common mistakes include blocking /blog/, /products/, CSS files, JavaScript files, or image directories.
Use Google Search Console’s robots.txt tester tool (under Settings > Robots.txt tester in older GSC versions, or by testing URLs in the URL Inspection tool). Enter specific URLs you want to verify and see if robots.txt blocks them. Also check the Page Indexing report for errors labeled “Blocked by robots.txt” — this shows exactly which URLs are blocked and preventing indexing. Review your robots.txt quarterly and especially after site changes, as template updates or plugin changes can accidentally modify robots.txt rules.
Is HTTPS still a ranking factor in 2026?
Yes, HTTPS remains a confirmed ranking signal and essential trust indicator. Google has used HTTPS as a ranking factor since 2014, and its importance has only increased. All major sites use HTTPS, and browsers display prominent security warnings for non-HTTPS pages, destroying user trust before they even see your content.
Beyond SEO, HTTPS protects user data, prevents man-in-the-middle attacks, and is required for modern web features like service workers and progressive web apps. HTTP/2 and HTTP/3 protocols — which significantly improve performance — require HTTPS. Sites without HTTPS face browser warnings, reduced conversions from security-conscious users, and ranking disadvantages against HTTPS competitors. If you haven’t implemented HTTPS yet, it’s a critical priority that takes precedence over most other technical optimizations.